My finished music video:

My front digipak panel:

My front digipak panel:
Right-click the image and open it in a new tab for a bigger version.

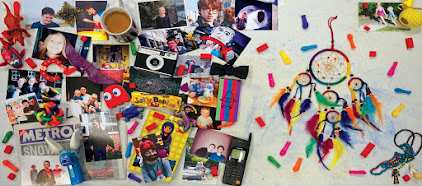
My inside digipak panels:

My inside digipak panels:
Right-click the image and open it in a new tab for a bigger version.

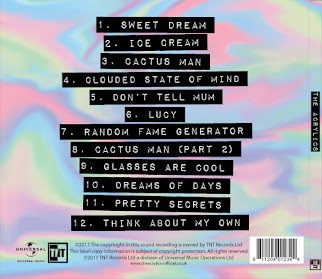
My back digipak panel (with album spine:)

My back digipak panel (with album spine:)
Right-click the image and open it in a new tab for a bigger version.

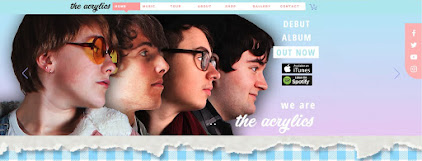
Click the image below to open my website in a new tab:

Thursday 30 March 2017

Evaluation Post 1: In what ways does your media product use, develop, or challenge forms and conventions of real media products?

Our group's film, 'What Happened to Peter Smith?', is a crime-mystery drama, about the titular teenager who goes missing but is found dead soon after. It follows the ensuing investigation by a weary detective into the five other teenage suspects who were with him when he was last seen, and who each have their own unique relationships with the deceased and each other. We took into account form, genre, narrative structure, and style during the construction process of our film opening.

Form:
An emaze slideshow describing the form of film openings, including ours.
Powered by emaze
Please click the fullscreen button in the lower right corner for optimal viewing.


The opening of 'The Usual Suspects,' excluding the titles, as extra content for the 'Form' webtool above.


Genre:
A Prezi slideshow about the crime and mystery drama genre, the genre of our film.

After clicking 'Start Prezi,' please click the fullscreen button in the lower right corner for optimal viewing.

Narrative Structure:
A Google Slides slideshow on narrative structure, and how it is relevant to our film.

Please click the fullscreen button in the centre of the bottom bar for optimal viewing.

Style:
A coggle mindmap that describes the style of our opening, with examples from other films.

Please click the 'Present this Coggle.' button, represented by a projector screen symbol in the top right corner, for optimal viewing.
A GIF showing how we created a smooth flow between character transitions.
A GIF demonstrating how we used camera movements to mirror the transitions and conversations between characters.
A GIF of one example of how we used framing for effect.

As you can hopefully see from these presentations of different aspects of the construction of our media product, we have used, developed, and even challenged various forms and conventions of real media products and their construction. This includes creating a film opening with typical and expected features, adhering to the genre's conventions, building a narrative with a tried-and-tested structure, and developing our own style to both fit in with yet stand out from the crowd.

Evaluation Post 2: How does your media product represent particular social groups?

Representation of different social groups is important in films. You need a mixture of recognisable stereotypes for the audience to identify so as to meet expectations, but you also need to challenge them somewhat to present a more realistic and appealing set of characters. This emaze presentation will describe how our media product represents social groups, by describing how we constructed one representation in detail.

Powered by emaze
Please click the fullscreen button in the lower right corner for optimal viewing.

This is the process we followed for all of the social groups in our film, as well as the philosophy behind our choices. However, it is important to note that the working class is one of the more detailed representations because of the impact it has on the story; namely that the detective also harbours the prejudices that have lead to modern stereotypes about the working class today.

Evaluation Post 3: What kind of media institution might distribute your media product and why?

The institutions chosen for a film are quite important to its creation and spread. You need a willing production company to help make it, especially as an indie, and an equally strong distributor to make sure people see it- again, especially hard as an indie. Some of the choices and reasons thereof regarding institutions for our film are in this Prezi slideshow.


After clicking 'Start Prezi,' please click the fullscreen button in the lower right corner for optimal viewing.

Our production company and distributor work well together- hopefully this means a quality media product can be created and delivered.

Evaluation Post 4: Who would be the audience for your media product?

The target audience of a media product is something that has to be decided very early on in its conception, and it influences pretty much everything else from there. 'What Happened to Peter Smith?' is no exception. This Google Slides slideshow describes the target audience for our film.


Please click the fullscreen button in the centre of the bottom bar for optimal viewing.

As you can see, our film has well-thought-out primary and secondary audiences, that will hopefully ensure it makes a splash both in its specific market as well as the mainstream.

Evaluation Post 5: How did you attract/address your audience?

Attracting and addressing the audience is a key part of making a film work- regardless of the level of technical impressiveness, people won't watch a film unless they want to. As the opening of the film is the first thing people see of it, it must be appealing enough to hook them into watching the rest of it. Luckily, there are multiple ways you can make the people you want to see your film, want to see your film. 

Here is a coggle mindmap discussing audience appeal in our film, in terms of theory such as Uses & Gratifications- in fact, the Uses & Gratifications branch of theory on the left is a good place to start, as this theory has helped me explore the different types of gratifications that the audience might get from our film. Our group also completed an audience feedback session- how we carried out the session, why we did it, and what results we got are also part of the mindmap.


Please click the 'Present this Coggle.' button, represented by a projector screen symbol, in the top right corner for optimal viewing.
A GIF that shows where we have used identification to draw in the audience- they see Raj doing some ordinary, listening to music, like they might do for fun, but suddenly he is thrust into a police investigation. Thus they can experience the life of someone similar to themselves in an extraordinary situation, which they wouldn't usually get to do.
After reviewing what we had tried to do to address and attract our audience, as well as seeing what real-life members of this target audience thought, we can conclude that we were successful in our aims.

Evaluation Post 6: What have you learnt about technologies from the process of constructing this product?

While we worked as a group throughout this project, I personally learnt some things about the technologies we all used to construct our project. My learning curve was unique to me, and it happened with all the hardware and software I came into contact with. I have created a Google Slides slideshow documenting my personal technological learning curve, therefore.


Please click the fullscreen button in the centre of the bottom bar for optimal viewing.

As you can see there was a clear progression in my knowledge of each area of construction, and I have even thought of things I would have done differently if I had the knowledge I have now back when I started the project.

Sunday 26 March 2017

Evaluation Post 7: Looking back at your preliminary task, what do you feel you have learnt it the progression from it to the full product?

The whole purpose of the preliminary task was to prepare us for the main task, and as such there has definitely been a progression in knowledge, skill, and experience. Provided is a Prezi slideshow describing the progression from the preliminary task to the main task.


After clicking 'Start Prezi,' please click the fullscreen button in the lower right corner for optimal viewing.

I think, in general, I have grown quite a lot throughout this project. Upon evaluating it in these posts, I seem to have come quite far.

Sunday 5 March 2017

Construction Post 30: Looking back- reflections on our final outcome

Our final film opening video. Click to play, and then adjust the video quality to the highest your device can handle, and then fullscreen it, for optimal viewing.

I am very happy with our final outcome.

There are very minimal flaws in our video- we have managed to almost perfectly realise the shared image in our heads. The long trek to get to this point has been worth it, especially as all the stuff we have done and learnt along the way has impacted on the quality of this final video.


Honestly, I'm not sure what else to say. I am glad we did this project and I enjoyed seeing the final product get officially uploaded to the school YouTube channel, marking the moment we finally finished and had a satisfactory product.

Construction Post 29: My technical learning curve during the construction phase

I definitely went through a learning curve during the construction phase. From previous projects, and even the earlier stages of this project, I had already done some shoot and edit sessions, but I did some things during this phase that I hadn't before.

During the shooting session, one of the main things I had never really done before was camera movements. The ones I had done weren't extremely ambitious and there weren't many of them, but in this project we did quite a lot of different movements, so I learned how to do those due to necessity.
A photo of me adjusting the camera in order to get it ready for the tilt shot involving Jack and Sayo's characters. The tilt was a very tricky shot, and all three of us tried our hands at the movement- it was the biggest problem in the test shoot (at that time it was an arc, and we had to change it to make it easier,) and it still required many takes in the main shoot. Click to enlarge.
Camera movements were a great thing to learn in my opinion, and I am very happy with how they look in our finished video, especially considering how awkward they looked in the test shoot and how hard they were to do in the main shoot.

At the beginning of Edit Week 2, I hadn't graded or colour-corrected much- I had done it before in a previous school year and media project, although I wasn't very good at it and didn't understand it greatly. However, this time around, I was able to identify exactly what needed to be done to achieve the look we wanted, and I had a large hand in colour-correcting quite a few shots.
A picture of me colour-correcting, as part of the grading process. Click to enlarge.
Grading and colour-correcting really impacted our video- they helped create the style we were aiming for. As such, I am really glad I learned how to do them- the project would not have been as good without them.

I think that, from my original starting point, I have learned quite a lot about construction- I have gained more experience in things that I have done before, such as using the camera and editing suite, but have learned new techniques that have helped me use those pieces of equipment more effectively, such as movements and grading.

Construction Post 28: My personal contribution to the edit sessions

During post-production I took active roles in editing, making suggestions while others were editing, and creating and exporting titles.
A photo of me using the edit suite. While on the edit suite, I ensured that clips were the right length and that they matched the previous and following clips, I graded clips, I adjusted the level of different pieces of audio, I moved titles around, and more. Click to enlarge.
I used the editing suite for all the standard stuff, like cutting and adding titles and working with music and audio and so on, just like the other group members. However, some notable things I personally did were suggesting and then implementing shot re-framing using Premiere in order to avoid having to re-shoot any shots, and colour correcting after we laid out the base grading, amongst other things.

I also did titling on the Macbook, which was separate from the main editing suite but still an integral part of the editing process, as the titles were only able to be created in Livetype on the Macbook, and were then exported to the editing suite.
An image of me using Livetype on a Macbook to export a title, after finishing creating it, to the shown USB, so that it could be transferred to the main edit suite and then used in the video. Click to enlarge.
I had a personal hand in the development of the titles, taking part in discussions over font and suggesting the one we ended up using, as well as other discussions about different aspects of the design. I also personally created and exported a couple of titles, such as "edited by mary pan," according to the then-finalised specification.

Just like during the shoot session, I did a lot of necessary work alongside my teammates, even though my role hasn't really changed over all the editing we have done during this project- we have stuck to the system of trying to equally split work, and it seems to be going well.

Construction Post 27: My personal contribution to the shoot session(s)

My role during the filming was varied, like both of my group members. I manned the camera and monitored sound at the same time, I directed and used the clapperboard, and I even acted.
A shot of me operating the camera while wearing the headphones to ensure the sound going to the microphone was okay.
As a crew member, I took many of the shots that you can see in the final video. I also directed many others. I also aided my teammates while they were performing these roles- for example I once took over from one of them during a shot that contained a camera movement, so we had extra takes, as they were worried they were too shaky.
As well as helping out behind the camera, I also acted in our video.
As a cast member, I acted in a few shots so that we could obtain all the material needed to build our story during editing. Being both a crew and cast member meant we didn't have to balance one more outside actor as part of the organisation process, while also not having to drop any characters or scenes from our video, which could have negatively impacted on its quality.

Overall I did much the same as I did during the test shoot- I was an essential part of the shoot session due to the work I did both behind and in front of the camera, just like both of my groupmates.

Construction Post 26: Edit week 2- titles, video FX, grading

In Edit Week 2 we had to actually complete our video. This meant taking the rough version from Edit Week 1 and adding titles, grading, effects, and so on. We used the schedule we had made at the beginning of the first editing week because it had served us well so far.
Our editing week two schedule. Click to enlarge.
We packed it fuller than the previous week- in fact putting down all of our free time in school and for an hour and a quarter after it ended- to make sure we got everything done on time, which luckily we did.
A sequence from the test shoot, without grading. Notice the different lighting in each shot, and the overall low-quality of the lighting.
The same sequence from the main video, with grading. Here, the lighting is better quality overall, and fits with the mise-en-scène we are going for. Plus, it is much more consistent between shots.

Some titles from the test shoot. They are unrefined and too close together.
Some titles from the main video. They have effects to make them fluid and more pleasing to the eye. Also note the fade effect to smooth out the transition.
One extra piece of equipment we used during this week that we didn't in the first week was a Macbook with Livetype. Livetype is a great program for creating titles like those shown above, so we had one of us on a Macbook experimenting with and exporting titles while the other two continued in the previous roles from Edit Week 1.
Jack is titling on a Macbook in this image. His back is facing Sayo, who is currently on the edit suite across from these computers, and both of them can turn around to collaborate at any point. Click to enlarge.
Livetype worked quite well- we were able to create titles with effects that we wouldn't have been able to create in Premiere, either due to software limitations or just our skill limitations. The Macbook allowed us to push past these limitations and create fitting titles for our video.

Edit Week 2 was a success, in that we finished all our work on time and are fairly satisfied with it, despite its problems. One such problem was the increased length after adding titles and so on, but we were able to cut down the video to a more reasonable time. Otherwise, it all went without a hitch, and all the small extra things we did going from Edit Week 1 to 2 have added up to really improve the sequence.

Construction Post 25: Our back-up shoot

We decided to not do a back-up shoot. Editing is going well, and we don't seem to need to retake any shots- some shots that did need slight reframing or other reconfiguration could actually be fixed using the editing tools, such as Scale and Position in Premiere, to the point that people watching the opening for the first time couldn't tell which shots were unedited and which had been fixed.

We managed to avoid most of the mistakes we made in the test shoot, including errors such as leaving documentation or equipment in frame, requiring the shot to be taken again, as well as mistakes that arose from not being able to test things, such as how certain movements worked. Basically, the test shoot revealed to us many things that needed updating or fixing, as detailed earlier on the blog, and we managed to implement these changes well enough in our main shoot that we didn't need to make any further changes drastic enough to warrant a back-up shoot.

Construction Post 24: Edit week 1- the basic edit

For Edit Week 1, the aim was to create a basic version of our video, in order to help us spot any glaring mistakes that would require a re-shoot. Smaller and/or more specific edits, like cutting shots perfectly and adding titles and so on, would be left for Edit Week 2. The first thing we did was create an edit schedule for both weeks- experience taught us that this was the best way to map out the editing process and ensure everything gets done on time.
Our editing week one schedule. Click to enlarge.
Edit week one was mainly occupied with putting everything in sequence, without worrying about titles or anything else fancy, similar to these continuity shots.
Like with shooting, we tried to split the work between us. However, it was a little different as their was only one editing suite, which meant only one of us could take that role, and the other two just made suggestions and caught mistakes and so on. Thus we tried to rotate out who was using the keyboard and mouse every so often.
In this picture Sayo is the one operating the editing suite while Jack monitors his work- I was doing the same before and after taking this. Having three sets of eyes to watch for potential problems, improvements, and mistakes meant a higher quality of work overall. Click to enlarge.
This system worked well as we got all of the necessary work done before the deadline, and actually began a small amount of work on titles and other things usually reserved for Edit Week 2. This, plus the fact that we had decided on not doing a back-up shoot, meant we were firmly on track.

Construction Post 23: Our post-production kit

For our post-production, we decided to create a second kit list- very similar to the earlier production kit list, with the same goal of recording everything we needed all in one place, but separate to distinguish both stages and to stop a single list from becoming cluttered. We realised that at some point we would hand all the production kit in, and then we would no longer need the production kit list, but we would still be doing post-production at that point, so we would need to have a post-production equipment list.
The post-production equipment list. Click to enlarge.
It was about as useful as the previous equipment list- although we didn't physically borrow the equipment in this case, unlike during production, we still used it extensively while in the media department. Thus we needed to be familiar with everything and what it all did, so as to use it to the fullest extent and not forget to use any tool at our disposal.

Construction Post 22: Our main shoot session

After the pre-preparations for the main shoot, we decided to create a shootboard to plan out the day. We tried to improve on the previous one by staggering the arrivals of the actors more, as well as putting shots that had similar set-ups together, which we failed to remember to do with the original one. Otherwise it was a very similar process with the same purpose of making sure we knew exactly what we had to do on the shoot day.
One page of our main shootboard, showing all the different things it kept track of. Click to enlarge.
While everything went quite well this time, we didn't allow any time for mistakes- so when we realised we had incorrect lighting for a set of shots and had to re-do them, we fell behind somewhat. However, overall the shootboard ensured we stayed on track and got every shot we needed, and thanks to hard work on the part of both the group and the actors, we ended at the planned time despite any problems.
This shot was quite long, and had to be timed well so that both pictured actors turned to look at the third entering actor on a sound cue. We allocated this shot extra time, therefore.
In terms of the actual process of shooting, we all rotated between different jobs to keep everyone on their toes, and tried to follow the lay-out of the shootboard unless at the time of the shot we decided a different allocation of jobs would be better.
Here Sayo operates the camera and listens to sound, while Jack is preparing himself to act in the next shot with a script in front of him. Of course this leaves myself as the director, and after taking this picture I wrote in all the information onto the clapperboard and got into position in front of the camera. Click to enlarge.
This was quite a good system, as well all got to add our unique touches to each aspect of the filming, and none of us got too worn out doing the same job for the whole day.

By the end of the shoot we were all happy with what we had done- all the preparation had paid off as we had no problems that arose from organisation and so on. It was a definite improvement from the test shoot, as we have learned both from organising and carrying out that shoot, and managed to avoid any mistakes this time around- for example, we avoided incorrect lighting in one of our montage shots.

Construction Post 21: Our production kit

Upon deciding what equipment we would use for the final round of production, we compiled everything into a kit list to keep track of it all. This list helped us remember what we needed to bring to the set and later return to the school's media department, as well as giving us an overview of what everything was used for.
The production equipment list. Click to enlarge.
The kit list was useful, as we had quite a lot of equipment- as well as the standard camera and directing equipment, we were using a dolly for camera movements and an extra light for certain shots, and we had borrowed some props also. Plus, other groups did not have the same set of equipment as us- thus, for both of these reasons, it was helpful to know what our group in particular had.

As part of the preparations for production, we also had to sign an equipment release so that the media department knew we could be trusted with the standard kit, as well as any extra things we were borrowing from them. This was done for the test shoot, and then updated for the main shoot due to the need for more/different equipment.
The equipment release form. It was a formal agreement between our group and our teachers that we would take care of everything we had borrowed from their department, and employ the required training to help us achieve these, and it even kept track of all the equipment we needed before we created an official kit list. As you can see I personally signed it and went through the training. Click to enlarge.
It was useful as it allowed us to borrow necessary equipment from the school's media department- they could not be expected to loan us anything without some sort of guarantee or agreement that we would take care of it, and it even ensured we had the training needed to work with all the equipment given to us.

Another document we produced for both shoots and updated in between them was a home shoot form. You may recognise it from Post 14. It served the same purpose, but with the role expanded to the main shoot.
The shoot organisation form. It finalised the details of every shoot, and was updated to reflect changes in timings, actors, and so on. It was also another layer of safety guarantee for the media department- they made sure we had everything planned carefully, and only signed this and allowed shoots to proceed once they were satisfied. Click to enlarge.
This was a useful sheet. It kept track of the majority of the shoot information so we didn't have to, and was comprehensive in it's coverage of shoot details.

Overall, preparing for production was a useful step as it ensured that both we and the media department were happy with arrangements. It stopped us from going astray before we had even started, and doesn't really require any improvements as everything went according to plan.